ESR Schedule is a non-interactive timetable of your courses. It is possible to display it at any time no matter the Registration From/To date&time -> ideal for showing students the upcoming class schedule before the Registration Form becomes available.
—
To display the ESR Registration Form or Schedule on your website, you need to insert so called shortcode. The shortcode is a small script that will load the form with specific details (waves, groups, etc) and with a specific layout (days as rows, days as columns, etc).
To insert the ESR Schedule, you need to use the shortcode with specifying parameters.
Available parameters
- waves -> one or more Wave IDs divided by commas
- type -> schedule type
- by_days -> schedule with days as columns
- by_hours -> schedule with days as rows
- by_hours_compact -> schedule with days as rows, courses closely together (skipping free spaces and pauses)
- not using type parameter -> display the default schedule type, set up in the Settings
- show_groups -> if set to 1, the Registration Form will show a clickable filter for Groups
- filter_group -> one or more Group IDs, displaying only courses in specified groups
Examples
- Schedule for one wave –
[ esr_wave_schedule waves="1" type="by_days" ] - Schedule for multiple waves –
[ esr_wave_schedule waves="1,2" type="by_hours" ] - Schedule with group filter displayed –
[ esr_wave_schedule waves="1" type="by_hours" show_groups="1" ]
Using Quick Form Builder
Knowing the available parameters (above) is important. But in order to simplify it and prevent mistakes, you can use a dedicated Form Builder to create either a Registration Form or a Schedule.
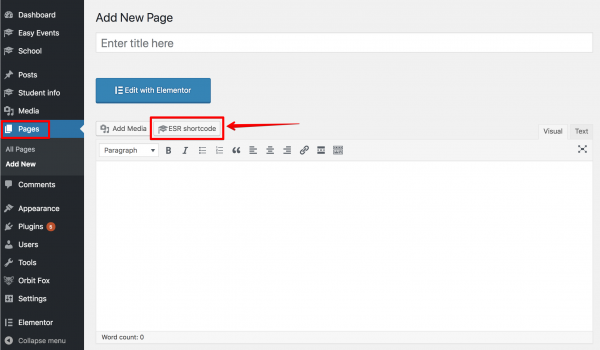
- Create or Edit your Page
- Click ESR Shortcode button
- Specify the Shortcode Type (reg form or schedule)
- Select which Waves to display
- Specify Additional Settings if needed
Note: Always paste the shortcode without any formatting. To make sure you paste it as pure text, use Shift+Ctrl+V (or Shift+Cmd+V on MacOS).
